Have you ever spent more time scheduling a meeting among multiple people than the meeting itself? It's surprisingly simple and easy to avoid that, and schedule a meeting during an available time slot among all of your guests.
Showing posts with label Google Apps for Education. Show all posts
Showing posts with label Google Apps for Education. Show all posts
Friday, May 27, 2016


Monday, November 23, 2015
Uploading Multiple Events to a Google Calendar
Do you have a bunch of events that you need to place into a Google Calendar? You can do it one-by-one in the Google Calendar interface, but that can get pretty tedious pretty quickly, especially if you have a few dozen (or hundred!) events to post. Luckily, Google Calendar speaks the language of the CSV file. To get started, log into your Gmail or Google Apps for Education account and click this link to my template spreadsheet. It will prompt you to make a copy for yourself.
1. Fill in your events, following the formatting of the date and time indicators:

2. Doublecheck your entries, and download your spreadsheet as a .CSV file:

3. Go to the settings area for your Google Calendars. Make sure you click the little disclosure triangle for "My Calendars" and not an individual calendar:

4. Look for the "Import calendar" link and click it:

5. A popup will appear. Browse for your .CSV file:

6. Select the calendar you want the events in your spreadsheet to appear.

7. If you formatted the .CSV file properly, all of your events will be uploaded and processed into the Google Calendar you indicated, with dates, times, descriptions, and locations all in place:
 Pretty cool, huh?!
1. Fill in your events, following the formatting of the date and time indicators:

2. Doublecheck your entries, and download your spreadsheet as a .CSV file:

3. Go to the settings area for your Google Calendars. Make sure you click the little disclosure triangle for "My Calendars" and not an individual calendar:

4. Look for the "Import calendar" link and click it:

5. A popup will appear. Browse for your .CSV file:

6. Select the calendar you want the events in your spreadsheet to appear.

7. If you formatted the .CSV file properly, all of your events will be uploaded and processed into the Google Calendar you indicated, with dates, times, descriptions, and locations all in place:

Monday, September 28, 2015
Appointment Slots in Google Calendar
Wouldn't it be great if you could send out, or publish a link that people could click, and be taken to a view of your calendar, where they could see available appointment slots, and all they had to do to make an appointment with you is click an available slot, and then the event appears on both your and their calendar? Welcome to Appointment Slots!
1. Important: Make sure you are in Week or Day view. Click into any date/time area on your Google Calendar, and a popup will appear. Click "Appointment slots" at the top of the popup, and then "Edit details" at the bottom:

2. This is where you will do all (and it's not much) of the heavy lifting:

3. Make sure you put something into the "Title" field that will make sense to both you and your end user. For example, if you are setting up advising appointments with students, rather than "Appointment," consider "Advising Appointment."
4. You are likely using Appointment Slots in a repeating fashion. If so, click the "Does not repeat…" checkbox (I usually need to choose "Custom…":


Also be sure to indicate a meeting duration time, and a meeting location in the "Add location" field.
5. Consider something like this in the "Description" field:
Bring your education plan, degree audit documents from DegreeRunner (if you have access) and/or any documents pertaining to your college course of study.
6. Right-click and copy the long, blue URL:

That's what you can send to your students and/or place in your Moodle course and/or email message, etc.
7. Click the blue "SAVE" button in the upper left:

Here is what it looks like when I access someone else's Appointment slots link:

Check out all of those appointment slots - I can seem them in context with my other appointments!
When someone clicks to reserve a time slot with you, here is what they will see:

Note that they can customize the details of the event after they save it.
Pretty nifty, huh? I think you've got enough to go on, so go ahead and tinker with your own Appointment Slots. And share your impressions and experience in the comments section below!
1. Important: Make sure you are in Week or Day view. Click into any date/time area on your Google Calendar, and a popup will appear. Click "Appointment slots" at the top of the popup, and then "Edit details" at the bottom:

2. This is where you will do all (and it's not much) of the heavy lifting:
3. Make sure you put something into the "Title" field that will make sense to both you and your end user. For example, if you are setting up advising appointments with students, rather than "Appointment," consider "Advising Appointment."
4. You are likely using Appointment Slots in a repeating fashion. If so, click the "Does not repeat…" checkbox (I usually need to choose "Custom…":
I set this series of Appointment Slots to repeat weekly on Mondays and Wednesdays until the end of the term:
5. Consider something like this in the "Description" field:
Bring your education plan, degree audit documents from DegreeRunner (if you have access) and/or any documents pertaining to your college course of study.
6. Right-click and copy the long, blue URL:
That's what you can send to your students and/or place in your Moodle course and/or email message, etc.
NOTE: The Appointment Slot URL is the URL for ALL appointment slots for the Google Calendar in which you are creating the appointment slot. If you need/want a unique URL, make a different calendar for that.
7. Click the blue "SAVE" button in the upper left:
Here is what it looks like when I access someone else's Appointment slots link:

Check out all of those appointment slots - I can seem them in context with my other appointments!
When someone clicks to reserve a time slot with you, here is what they will see:

Note that they can customize the details of the event after they save it.
Pretty nifty, huh? I think you've got enough to go on, so go ahead and tinker with your own Appointment Slots. And share your impressions and experience in the comments section below!
For more info, see Google's Help Center page on Appointment Slots.
Friday, September 18, 2015
Google Docs and Track Changes…
So you say you don't use Google Docs because you must have the "Track Changes" feature of Microsoft Word. Or maybe it's Mail Merge you can't live without. In typical Google fashion, they have taken those concepts to a whole new level (not to mention Revision History, Notifications, Bookmarks, etc.):
Think of the educational and administrative implications of these advancements - it's mind-boggling!
Think of the educational and administrative implications of these advancements - it's mind-boggling!
Wednesday, April 22, 2015
Uploading a Word Document into Google Docs
If you haven't used Google Drive at all, or very much, do yourself a favor and get set up to use all of the doc sharing and editing features by configuring your Google Drive Upload Settings first.
When I mention the editing features of Google Docs, I realize that's one of those things that's easier to understand from practice, rather than reading. Let it suffice to say that, unless you are using more advanced features of Microsoft Office (Word, Excel, and PowerPoint), there is a strong chance you can do without those tools once and for all. I have had almost zero use in my personal and professional work for many years now.
So you want to learn how to upload a Word Doc (or, for that matter, an Excel or PowerPoint file) in your Google Drive? It's really easy. First, log into your Google Apps for Education account (that's your LBCC Gmail account). Next, look for the nine little squares (I call it the "Rubic's Cube) in the upper right, and then the "Drive" icon:

A new browser tab opens showing your Google Drive. If you see a prompt across the top of the page offering to "install" Google Drive onto your computer, you can close that out. You most likely won't need or want that, especially if you are working on a desktop machine that's always connected to the Internet.
Ready to upload your first Word Doc? Not so fast: it's probably a good idea to set up some basic folders first. Click the red "New" button in the upper left:

Go ahead and create a few folders, so you can start off being organized… or just jump right in like I did, and organize later.
Ready to upload your first Word Doc? Ok, click the red "New" button again, and then click "File Upload."

If you adjusted your Upload Settings (see the top of this post), your Word Doc will be uploaded, and converted to an editable Google Doc format on-the-fly. Double-click on the Doc to edit it, share it, publish it, etc. Welcome to a higher level of functionality in your document workflow!
When I mention the editing features of Google Docs, I realize that's one of those things that's easier to understand from practice, rather than reading. Let it suffice to say that, unless you are using more advanced features of Microsoft Office (Word, Excel, and PowerPoint), there is a strong chance you can do without those tools once and for all. I have had almost zero use in my personal and professional work for many years now.
So you want to learn how to upload a Word Doc (or, for that matter, an Excel or PowerPoint file) in your Google Drive? It's really easy. First, log into your Google Apps for Education account (that's your LBCC Gmail account). Next, look for the nine little squares (I call it the "Rubic's Cube) in the upper right, and then the "Drive" icon:
Ready to upload your first Word Doc? Not so fast: it's probably a good idea to set up some basic folders first. Click the red "New" button in the upper left:
Go ahead and create a few folders, so you can start off being organized… or just jump right in like I did, and organize later.
Ready to upload your first Word Doc? Ok, click the red "New" button again, and then click "File Upload."
If you adjusted your Upload Settings (see the top of this post), your Word Doc will be uploaded, and converted to an editable Google Doc format on-the-fly. Double-click on the Doc to edit it, share it, publish it, etc. Welcome to a higher level of functionality in your document workflow!
Monday, February 23, 2015
How To Force a Copy of a Google Doc
You probably know you can share a Google Doc with varying levels of privilege. The default setting is “Can Edit,” but there are two other settings, as well:

Those are great, but what if you need to share a Doc (or Sheet, or Slide) in a way that will let the other person(s) view only, but also optionally make a copy for themselves? You can tell them to click File > Make a Copy…

… but you know someone will eventually not understand that, and have issues with that step.
What if there was a way to force them to copy the Doc before they could even see it… maybe with a special link that will take them to a page that looks something like this:
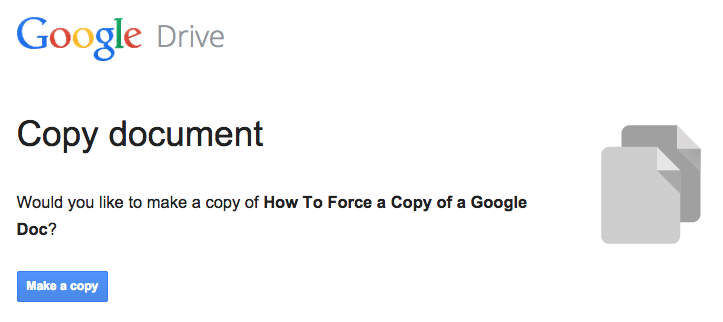
Funny thing is, this little trick so so easy, you will wish you had thought of it first. All you need to do is:
- Share the Doc (via the
button, in any context: editing, commenting, or just viewing) with the person on the other end, and then copy the link in your browser address bar.
- Look for the word “edit” at the end of the URL:
https://docs.google.com/document/d/11V9qEndTXVmnVEvtZMRk0cQefcdF5TxwqFQSvVlIcjE/edit
- Replace it with “copy,” and send that to them:
https://docs.google.com/document/d/11V9qEndTXVmnVEvtZMRk0cQefcdF5TxwqFQSvVlIcjE/copy
BOOM - it really is that easy!
NOTE: Have you ever seen a long URL link the ones above in an email message, and it didn't work when you clicked on it? That's usually because part of the URL was wrapped down to the line below it, breaking the valid link. A great way to avoid that is to shorten the URL via a tool like bitly.com.
NOTE: Have you ever seen a long URL link the ones above in an email message, and it didn't work when you clicked on it? That's usually because part of the URL was wrapped down to the line below it, breaking the valid link. A great way to avoid that is to shorten the URL via a tool like bitly.com.
Friday, January 23, 2015
How to Schedule Gmail Messages
I am hesitant to use 3rd-party apps in my Gmail until & unless someone I know has recommended it. Luckily, I keep this page bookmarked for just such an occasion. Let me know what you think of it!
Subscribe to:
Posts (Atom)