Showing posts with label eLearning. Show all posts

Friday, January 6, 2017

Moodle Recycle Bin

We are happy to report that our Moodle system now has a recycle bin! If you have ever deleted an Activity or Resource from your Moodle shell, and later wished you could get it back, now you will have up to 30 days to restore it into your course.


You will see the link to the recycle bin in the Administration block in your Moodle course shell:


It's easy to restore an item:


Note that when you restore an Activity or Resource, it will reappear at the bottom of the content section where it previously resided, not its original position.

Let us know how you like this new feature!

Tuesday, October 11, 2016

The Perfect eLearning Course?

What I'm reading today:

The Perfect e-Learning Course™ is a legendary creature that changes its shape with each new technological and aesthetic trend. It is all things to all people – classic, yet also fresh, modern, and applicable to all levels of learner experience and skill. I’ve even heard that, when you measure the readability of such a course, the scale doesn’t give you a grade level. It just says “Awesome.”

Read more here.

Tuesday, August 16, 2016

Instant Rewards of Teaching in Moodle

From "Teaching with Moodle for total beginners"

  • saving time and money on photocopying course materials
  • less paperwork (or paper marking) to carry with you
  • less correcting (marking) overall
  • richer and more interactive homework and/or assignments
  • formal evaluation of discussion skills and contributions (some students excel here whilst performing poorly elsewhere)
  • a wider range of deep-learning activities to stretch more able students
  • having all your detailed feedback about the targets you have set stored in the Gradebook automatically, not lost on the one paper copy of the essay, which you handed back to the student.

Wednesday, December 23, 2015

Moodle 2.9 Updates

Here is a short screencast on the version 2.9 updates coming soon to LBCC Moodle:


Monday, January 19, 2015

Build a New Model

Ok, we have built a new model of effective and efficient face-to-face, online, and hybrid education. What's our next step toward greater adoption, Mr. Fuller?


Tuesday, December 16, 2014

Apps & Extensions #1

Best Study Apps, Tools, Tips, & Techniques

From OpenColleges (you will like the interactivity on that page)


"Although productivity apps can certainly be useful in many cases, keep in mind that it is possible to have too much of a good thing. Choose your apps carefully and make sure that each one will actually help you rather than serve as yet another distraction."

How to be Effective when Studying – Best Study Apps, Tools, Tips & Techniques by Open Colleges

The Educational Technology Pedagogy Wheel

These thoughts really jumped out at me in this article, so much so that I just had to pass it along:
-------

Many of the failures in #edtech are failures in #edtech integration… Seeing the pieces–tablets, apps, learning goals, cognitive actions, etc.–and how they work together is everything. Without that vision, any bit of #edtech is limp and lifeless.

An example?

Google Drive in and of itself is neither good nor bad.

Google Drive in service of a task previously unattainable without it, attended to by an engaged student, where said student is using a spreadsheet to classify mammal behavior with a student in another school as part of a presentation to a local wildlife preserve as the culminating task in a project-based learning unit on animal ecology?

That’s something else altogether.
-------
Let's fight the urge to reflexively assume that educational technology is usually or mostly just about getting to tinker with cool apps and gizmos. Maybe an occasional tool could take the learning and retention in your course to a whole new level, if you just give it a chance. Be the lifelong learner you encourage your students to be by setting the example and exploring new ways to implement technology toward their learning, retention, and overall success… like those who taught you did.

Tuesday, November 18, 2014

Adding a Link to Your Moodle Shell

Linking to an outside webpage from your Moodle course is one of the simplest, yet most effective ways to share content with your students. Watch this screencast once or twice, and you will be opening your students to all kinds of great content.


Tuesday, September 30, 2014

Create & Submit A Writing Assignment for Moodle Via Google Docs, Spreadsheets & Presentations

PSST: Guess what? Unless you are taking a class on a Microsoft Office product (Word, Excel, PowerPoint), you probably don't need Microsoft Office (that goes for real life, too). Do you have a writing assignment to turn in? Here's how to do it in Google Docs, without printing a single page (with one exception):

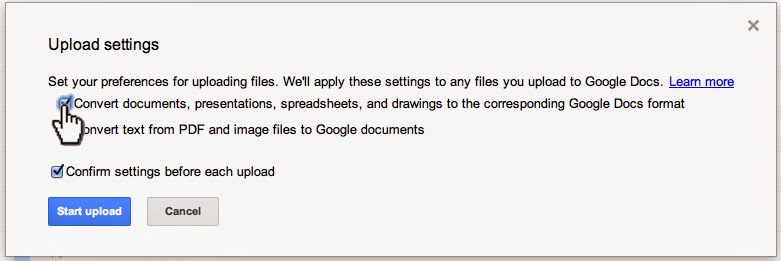
First, if you are just starting to use Google Drive, Check your Google Drive Upload Settings. You  will be creating a doc, not uploading a file in this tutorial, but this will be handy for when you start uploading files into your Google Drive.


Step #1: When you are logged in to your LBCC Email, click the nine tiny squares in the upper right, and then click on the "Drive" icon:


Step #2: Click the red "New" button in the upper left, then click "Google Docs"


A new browser tab will open with your new doc ready to go. 

Step #3: Click where you see "Untitled document" in the upper left:


Give your doc a name that makes sense:


Step #4: Your instructor may choose among a variety of assignment submission procedures:

TEXT INPUT: If your instructor has set up your assignment to require text input, you can select and copy all of the text from your Google Doc, and paste it into the Moodle assignment text input box.

FILE SUBMISSION: If your instructor has set up your assignment to require a file upload, you can download your Google Doc into the required file type, and upload it into the Moodle assignment:


GOOGLE DOC SHARE: If your instructor has set up your assignment to require you share your submission with them via Google Drive, you can do so via the blue "Share" button in the upper right:


Click in the "Invite people" field and start typing your instructor's name. Be sure to indicate their staff account (@linnbenton.edu), and not their student account (@mail.linnbenton.edu):


Indicate their sharing privilege setting (most likely "Can comment"), and then click the blue "Send" button:


PAPER SUBMISSION: If your instructor has set up your assignment to require a hard copy, you can print it out and hand it in. You've done this before. You know what to do:


Step #5: Be sure to follow any additional instructions in the Moodle assignment to finalize your assignment submission.

Wednesday, August 27, 2014

Publishing a Slideshow Presentation in Moodle

So you want to publish your awesome PowerPoint or Keynote presentation in your Moodle course? Guess what concept gave birth to Google Apps for Education here at Linn-Benton Community College? This one!


We handle publishing of Google Docs and Google Presentations in Moodle courses differently. We publish Docs by linking to them (see how here), and Presentations by embedding them in a Moodle page within your course shell. Here's the step-by-step:

1. Open your Moodle course in one browser tab, and Google Drive in another tab.

2. If you already have the presentation you wish to publish in your Google Drive, skip to step #4; otherwise, click the red "Upload" button, and browse for the file you need:


3. Make sure conversion is turned on (note: see how to set your Google Drive conversion settings here):


4. When you are in the editing interface for your Google Presentation, click File > Publish to the Web…


5. You will have a couple of confirmations to click through. Start publishing:


Are you sure (yes, of course I'm sure!):


6. You will get a dialog box that lets you configure the size of the presentation you are about to embed in your Moodle course. Choose "Small" presentation size, so that users on small monitors (think netbooks, etc.) won't have to scroll left and right to view your presentation. They can always choose to view it full screen:


7. Click in the "Embed code" field and copy it to the clipboard:


8. Now go to your Moodle course (that other browser tab), and make sure editing is turned on:

9. Click the "Add an Activity or resource" link in the content block where you want the link to appear (of course, you can always move it later):


10. Select "Page" near the bottom of the left pane:


11. Input in the "Name" and "Description" fields:


12. You may need to click the Toolbar Toggle…


… to get the "Edit HTML source" button visible to click:


13. This makes the HTML source editor dialog box appear. Paste the HTML from the Google Presentation (from step #7 above) into the input box, and click the "Update" button:


14. Click either the "Save and Return to Course" or "Save and Display" button at the bottom.


That's all there is to it. You don't need to redo the above steps if and when you want to edit your presentation; just access it in Google Drive and you're done - it's published and embedded in Moodle (and elsewhere, if you choose), so it's a live document to which your students will have one-click access, without needing anything more than a modern web browser. Cool, huh?

Comment below, and MOODLE ON.

Tuesday, July 22, 2014

Low Digital Fluency of Faculty

From the 2014 NMC Horizon Report: 2014 Higher Education Edition (pp 22-23):

"Faculty training still does not acknowledge the fact that digital media literacy continues its rise in importance as a key skill in every discipline and profession. Despite the widespread agreement on the importance of digital media literacy, training in the supporting skills and techniques is rare in teacher education and non-existent in the preparation of faculty. As lecturers and professors begin to realize that they are limiting their students by not helping them to develop and use digital media literacy skills across the curriculum, the lack of formal training is being offset through professional development or informal learning, but we are far from seeing digital media literacy as a norm. This challenge is exacerbated by the fact that digital literacy is less about tools and more about thinking, and thus skills and standards based on tools and platforms have proven to be somewhat ephemeral."

Monday, April 21, 2014

Instructor Responsibility Sign

The other day, I noticed a sign mounted on the wall by the door inside a classroom:


It made me think of what an equivalent sign might look like for a Moodle course shell. How about this:


Thursday, April 3, 2014

Sharing a Google Doc With Specified & Unspecified People

When it comes to getting eyeballs onto a Google Doc (including Presentations and Spreadsheets), there are two main paths to follow: Publishing, and Sharing. See our tutorial on publishing a Google Doc here.

When you think of sharing a Google Doc, there are a lot more options and features, compared to the old email attachment method. I am writing this tutorial in the context of a student sharing a doc with their instructor and other classmates, but the concept can be easily applied to a number of office procedure scenarios where an online document needs to be efficiently shared among people. Also, this is just an overview, so be sure to explore the features and benefits of the options we don't cover here; there are some great tools there! Here goes:

1. When you are viewing the Google Doc in question, click the blue "Share" button in the upper right:


2. This brings up the "Share with others"dialog box. Click "Get shareable link"


3. Click the "Anyone at Linn-Benton Communit…" area, then click "More…" at the bottom of the dropdown menu:


4. "Anyone with the link" is a good way to share most docs in an LMS course. That won't require students to be logged in to their Google Apps for Ed account to view it.


Note that "Can view" is the default Access setting, but you can also choose to give people editing or commenting privilege. NOTE: "Can comment" is non-editing.


5. Click the "Save" button at the bottom, and the link will be ready to copy to the clipboard:


6. Paste that link into your Moodle course, email message, etc., and people will be able to access the live document!


Ok, now we will branch off a little to show how to share with a specified person(s). Take a look at the screenshot in step 2, the "Sharing settings" dialog. Here it is again, after clicking in the "Invite people" field:


When you start typing names in the field, note how people's names start to appear. Be sure to select the correct email address, as many employees have both a staff- and student-formatted account:


Decide among the various sending options, and click the blue "Send" button.


And that's how you share a Google Doc with specific people!

We would love to know how you share Google Docs, so feel free to share via a comment below!

Wednesday, April 2, 2014

Fix Your Broken Attendance Activity

In case you haven't noticed, the Attendance activity in our current version of Moodle is… well, it's not really broken, it just has numerous redundant session types. The most commonly used session types are:

Present
Late
Excused
Absent

You only need one each of those basic session types to use the Moodle Attendance activity, but most Instructors I have been working with shy away from it when they see all of the redundant (not to mention repetitive and extraneous) session types:


Ugh. Who would want to take the time to delete all but one each of the necessary "PLEA" session types? I'll tell ya who - ME! Want a copy of it to put into your own Moodle course? Okay, here you go, and here is how to put it into your course shell:


2. Log into your Moodle course.

3. Click "Restore" in the Settings block:


4. Browse for the "Attendance-PLEA.mbz" file you downloaded from the above link, and click the "Restore" button:


5. Make sure "Merge the backup course into this course" is selected, and click the "Continue" button below it:


6. Click the "Continue" and "Next" buttons on the next few screens…


7. … and then the "Perform restore" button.


8. When the process is complete (it should only take a few seconds), click the "Continue" button to be taken to your course shell:

9. You can now use the Attendance activity to track student attendance, with or without point value. You can also deploy the corresponding Attendance block:


There you have it - now you can document your students' attendance directly in Moodle!

Wednesday, February 26, 2014

Enable Audio Narration in Google Presentation

eLearning professionals are clamoring for Google to incorporate audio narration in Google Presentation.


We MUST have an online presentation tool that meets three basic needs:

  1. upload of existing PowerPoint presentations and creation of new presentations within the same tool
  2. simple editing/updating of published presentations without replacing & removing exiting
  3. simple way to add existing, and record new narration audio on a slide-by-slide basis

See the discussion, and join in here. And please share it within your social media circles!

Tuesday, February 4, 2014

Using the Kaltura Video Resource in Moodle

We have come a long way since the days of uploading video files onto our LMS (Blackboard, and now Moodle) and the DSS server for student view. Our LBCC Media YouTube Channel has served us well, and we will continue to use it for specific needs, but we are really excited to be able to offer instructors and students the ability to share video directly through Moodle without having to deal with large video files. Well, you still have to upload your video file, but the people on the other end don't - all they will need to do is click a link, and they will be able to watch your video as it streams (not downloading) on their device, whether a computer, tablet, phone, etc. Yes, we really are there!

There are currently two basic ways to use Kaltura, new video tool in LBCC Moodle: instructor-generated video resources, and video assignments, where students can upload video content to share with their instructor (and fellow students, if needed).

Let's start with the Kaltura Video Resource:

1. Turn editing on in your Moodle course.


2. Click the "Add an activity or resource" link in the content block in which you want the item to appear.


3. Select "Kaltura Video Resource"


4. Input in the Name and Description fields, and select the "Upload media or record from webcam" option.


5. Browse for your video.


6. Click the "Upload" button.


7. Give your video a title, tags, and a description, and click the "Next" button.


8. You can click the "Preview" button to preview your video. 


If you see this announcement: "Your video is still converting. Please check the status of your video at a later time," you will need to… well, do what it says.

9. If you click "Save and display," you will be taken to the resource you just built.


10. Here is the finished product, ready for student access!


Yours may not look quite this scary, but we can't all be so lucky!

Comment below!